Did you know that the three main reasons car accidents occur in Canada are high speed, impaired driving, or distractions? Between everyday accidents and adverse weather, your windshield is susceptible to damage at any time.
If you recently were in an accident and something cracked your car window, you might be racking your brain to determine what to do next. Unfortunately, once your auto glass gets broken, it can be very challenging to repair it adequately.
Not only did your vehicle transcend from pristine to a little less beautiful, but you also have to worry about potential safety issues. It’s a shame to let your car suffer because you can’t pay to replace the glass.
Don’t worry; there are ways to get auto glass chip repair done by expert technicians near you. Below you will read a rundown of the chip repair process.
Why You Should Repair Chips
Many things can cause scratches or cracks in your auto glass. For example, something as simple as a piece of gravel falling off a truck can cause plenty of damage. Therefore, any damage to your auto glass needs repairing promptly.
So the question remains; when should you repair a chip or scratch in your auto glass? The answer is as soon as possible. The crack can worsen without timely care and cause many problems.
If you allow a crack or chip to linger, the biggest issue is it will impede your ability to see. In addition, as time goes by, spider cracks can branch out from the original damage and continue to deteriorate your windshield. With more cracks in your glass, your field of vision will continue to decline.
Another reason you want to get your auto glass repaired quickly is the possibility of receiving a ticket. Police are responsible for maintaining safety; they may pull you over if your windshield is damaged. If the windshield is not fixed promptly after the first warning, you will likely receive a ticket.
A damaged windshield reduces your vehicle’s structural integrity. The windshield supports the roof of your car, and if left unrepaired, it can be fatal.
For example, a fully intact windshield can keep the top from caving in in a rollover accident. On the other hand, if your windshield is fractured, it may cause the roof to collapse entirely.
What Tools You Will Need
Your windshield needs repairing, but what tools will you need to succeed? The first thing you need to look for is a windshield repair kit. There are plenty of different types; you must pick the best one for your budget and the fracture in your auto glass.
When looking at repair kits, there are several things to consider. Below you will find a list of essential details to keep in mind.
- Cost of the kit
- Acceptable chip size
- Expiration date
- Steps to cure the epoxy
Why should you care about the expiration date on a windshield repair kit? That’s because epoxy has an expiration date, and if it’s an old kit, it won’t adhere correctly or repair your auto glass.
In most repair kits, UV-activated epoxy and resin, curing strips, suction plungers, and a scraping tool. Repair kits are for everyone to be able to use, so if you know nothing about cars, that is okay! Every kit comes with directions and plenty of information for you to be successful.
How to Prepare the Area
Now that you have your auto glass repair kit, it’s time to open it up and prepare your windshield. Make sure you clean the whole space around the chipped windshield before using anything within the kit. Remember to spray rubbing alcohol into a microfiber towel instead of directly onto the cracked section, as this can create more damage.
If there is any loose glass in the designated space, use a thumbtack or something sharp and thin to remove the debris. Most of the epoxy and resin that come with windshield repair kits are UV-activated; you need to park somewhere sunny!
If your area has experienced rain recently, use a hairdryer to dry the chipped area to remove any moisture inside the windshield. The process takes about two hours, so ensure you have enough time regarding weather and direct sunlight.
Repairing the Chip
So you know how to restore the integrity and durability of your windshield, here are the exact steps.
Step One
The area is clean, and you’ve opened your repair kit. The first step in this process is to take the repair patch and remove the adhesive backing. Next, center the patch over the damaged area and place it firmly over the chipped section.
Now you can peel the other side of the patch off and attach the pedestal that came in the kit. These typically have tabs you can center over the patch for easy installation. The patch side facing you also has adhesive, where you will attach the pedestal.
Step Two
Depending on the kit you purchased, the epoxy and resin may need mixing together before use. Some kits will include a pre-mixed material or one you blend as you apply it. Pay attention to the instructions for your particular auto glass repair kit.
You will now take the mixture of epoxy and resin and fill the pedestal. Next, you will use the syringe to press the mixture down the pedestal until the plunger is in place. Once fully compressed, you will pull back on the plunger as far as it will go without removing it.
Step Three
After pulling back the plunger, you need to wait anywhere from one to ten minutes to let all of the air bubbles escape the resin. Again, check the directions for your specific kit to know precisely how long to wait.
A good rule of thumb here is to wait until you no longer see bubbles trying to escape the resin mixture.
Step Four
Now that the bubbles are gone remove the syringe and reinsert it. Removing and replacing the plunger removes the vacuum seal it once held and allows you to push the resin into your chipped windshield.
Now you can force the material through the syringe into the patch, but make sure you do it slowly. Most kits will tell you only to push about halfway down before stopping. Give the glass next to your chip a little tap; this will knock free any bubbles inside the fracture.
Get inside your vehicle and inspect the fracture. If you see that it could use a little more resin, continue to push slowly on the plunger. At this point, you only want to apply small amounts of the mixture at a time. If you flood the patch, you must start over, so be careful!
Step Five
Inspect the directions that came with your kit. The curing time is the most crucial step, so you must ensure that it gets the time it needs to set. Once the epoxy fully cures, you can remove the pedestal and patch.
After removing the patch, get up close and personal with your glass. If it needs an extra drop of resin mixture, this is the perfect time to add it.
Next, grab your curing strips and place these on top of your fracture. Make sure to do this at an angle, so no air bubbles form while it finishes curing.
Step Six
At this point, you need a sharp razor. You will utilize this tool to press any remaining bubbles out of the curing strip.
The razor will also help remove the strip once the mixture completely dries. The last step is to use the razor blade one last time to scrape any remaining resin off of the windshield gently.
Take extra care on this step, as the razor blade can easily scratch your windshield!
Caring for Your Auto Glass
Remember that repairing a chipped windshield is an inexpensive band-aid for your windshield. However, it will need replacing eventually, depending on your environment and the wear on your windshield.
Repair kits are not a permanent fix, but they will hold for a while. With that information, once you’ve utilized your repair kit, it would be a good idea to start saving up for your windshield replacement once it becomes necessary.
Auto Glass Chip Repair: When Is It Too Big?
If the cracks in your windshield are more significant than the size of a quarter or longer than three inches, you won’t be able to repair it yourself. Most windshield repair kits only include materials for damage three inches or smaller. If this is the
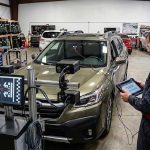
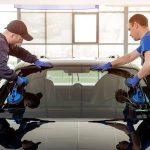
If your damage is extensive, it’s time to give the professionals at Auto Glass Zone a call! Auto Glass Zone offers a variety of auto glass services in repairs and replacements. They can replace or repair any auto glass; this includes side windows and your sunroof.
Trust the Professionals
If your windshield becomes cracked or you need auto glass chip repair, it’s time to pick up the phone! Auto Glass Zone even offers mobile services, so what are you waiting for?
Contact Auto Glass Zone Oakville today!